Showing posts with label SWING. Show all posts

Tuesday, August 10, 2010

Setting Initial value for InputDialog in JOptionPane

There are 6 showInputDialog methods in JOptionPane class and we can select either one of these methods based on our requirements. To create an initial value when an InputDialog pops out we need to make use of method with these signatures:
public static Object showInputDialog(Component parentComponent,
Object message,
String title,
int messageType,
Icon icon,
Object[] selectionValues,
Object initialSelectionValue)
throws HeadlessException
Let me describe the parameters in a more understandable way compared to the ones in the Java API Doc.
  • parentComponent - the parent Component for the dialog
  • message – The message to display when the dialog pops out
  • title – The title of the dialog
  • messageType - the type of message to be displayed: ERROR_MESSAGE, INFORMATION_MESSAGE, WARNING_MESSAGE, QUESTION_MESSAGE, or PLAIN_MESSAGE
  • icon – Your very own icon for the dialog
  • selectionValues – Provide few values to select (If this is null, the input field will be a JTextField rather than a JComboBox)
  • initialSelectionValue – The default initial value for the dialog


If you look at the code above, I made the parentComponent as null because the dialog is not referring to any component and I’ve declared the icon null as well because I don’t need a customized icon.

When I declare the selectionValues with an array called values, the input field turns into a JComboBox and the default value is assigned based on the initialSelectionValue, in this case its "A".

Let's say I don't want to provide options to the users and expect them to key in the values manually, but I still want to provide an initial value. All I have to do for that is, make the selectionValues parameter as null.


For further reference, have a look at the javadoc for JOptionPane: JOptionPane

Author: Thiagu

Monday, May 31, 2010

Build your very own Mouse Trap Application

This is a very simple yet interesting concept. I had been seeing such applications being developed right from school kids to working professionals using Microsoft technology for the past few years and wondered how to make it possible in Java. I was actually surprised to know that API’s for controlling mouse cursor had been there in Java since JDK 1.3. Well this shows that nothing is impossible in Java,.....Can anyone deny that...haha.

Now let’s move on exploring this concept step-by-step.

  1. Create a simple User Interface as shown below with 1 JButton. The JButton will used with an action “(System.exit(0))” once the cursor gets trapped within the frame.
  2. Use a MouseListener event on the JPanel and override the mouseExited() Method.
  3. The”if” statement in the OnMouseExit event is used to check if the cursor has went beyond the geographical boundaries of the JFrame. (This validation is done because even if the mouse touches the JButton, it will invoke the JPanel’s OnMouseExit Event).
  4. The next line after the “if” statement shows the usage of Robot API (An API used to control mouse and keyboard automatically. This API was introduced in JDK 1.3).
  5. The Robot API’s moveMouse method will move the cursor according to the X and Y axis that we set. (Here I’ve used the centre point of the JFrame ) .


Author: Thiagu

Wednesday, April 28, 2010

Perform an Event when “Enter” key is pressed

For this month since I had very limited time to come up with a post, I thought of discussing about this common yet simple question that many newbie have in mind.

Let’s say I have a JTextField and a JTextArea and every time when I press the “ENTER” key on the JTextfield, I need to append the text from the JTextField to the JTextArea.

This is a very simple scenario and to accomplish this we have to make use of the “KeyAdapter Class (which implements the KeyListener Interface)” and “KeyEvent Class”.

Once the key “Enter” is pressed we need to perform the action, so at this point we need to make use of the “keyReleased(KeyEvent evt)” method from the adapter class and then check if the keycode is equals to “evt.VK_ENTER”. The code snippets are as below.

For further reference and study kindly refer to this link http://java.sun.com/docs/books/tutorial/uiswing/events/keylistener.html

Author: Thiagu

Tuesday, March 30, 2010

Enabling a Row or a Column Selection in JTable (SWING)

In this example I’m going to discuss about how to select one whole row or a column when a cell in a JTable is clicked. It’s not something hard, since it just requires 3 lines of code to be included. Follow the steps below to make it happen.
Steps:
  1. Since we are just going to select one particular row or column in a JTable, the selection mode has to be set as Single selection using the constants in ListSelection Model Interface. E.g: jTable1.setSelectionMode(ListSelectionModel.SINGLE_SELECTION);
  2. If row selection is to be enabled, set the row selection method as “true” and column selection method as false”. Code snippet and output are as below.

  3. If column selection is to be enabled, set the row selection method as “false” and column selection method as “true”. Code snippet and output are as below.

Author: Thiagu

Saturday, February 27, 2010

Rendering ComboBox in a JTable (SWING)

Ever wondered how to make a cell in a JTable to render a JComboBox? This example will guide you on that. The scope of this tutorial does not have to be limited to combobox, the same concept applies in rendering other components in a JTable.
  1. Create a JTable with two columns as shown below.
  2. Create an inner class that implements TableCellRender as below
  3. Set the particular column's renderer as the renderer class that you have created
  4. Create a JComboBox variable with the necessary values and pass it as a parameter to the constructor of the DefaultCellEditor class
  5. WALLA....there’s your combobox, right where you want it...


Author: Thiagu

Tuesday, February 9, 2010

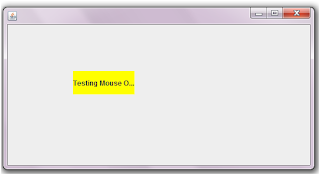
Changing JLabel’s background during mouse over (SWING)

Let’s look at how to change the background colour of a JLabel (by default is transparent) when the mouse cursor moves over it.

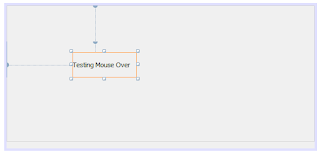
1. Create a JLable as above on your application using Netbeans IDE
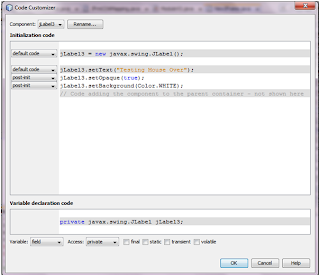
2. Include the code snippet below to change the background colour of the JLabel.


3. As you can see in the code, JLabel3.setOpaque(true) line is used because by default a JLable will have a “false” value for the Opaque which makes the background transparent.
4. Once the Opaque is set to true, change the background colour.

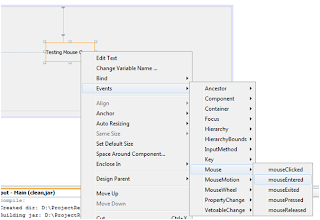
5. Select the mouse entered action, which provides an action when the cursor gets into the boundaries of the JLabel.
6. Include the code snippet below to change the colour of the JLabel during mouse over.

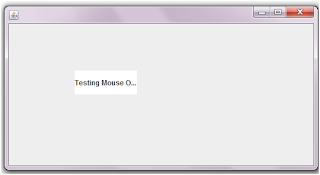
Results:

Before Mouse Over


After Mouse Over

Author: Thiagu